|
Chebacco Construction
Page 6
|
|
|
| Date |
Work Completed |
Time Estimate |
Photos |
| 6/26/04 |
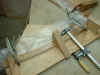
Glued cabin sides,
decks forward of bulkhead 4, and cabin top stringer. Laminated cabin
rafters - I took the curve of the top of mold 2 and 3 and built jigs to
match the curve. I cut several strips of douglas fir 1/4" thick x
3/4" wide. The strips were epoxyed together and clamped in the jigs
using waxed paper to prevent them from sticking to the jig. |
8 hrs |

|
| 6/27/04 |
Removed molds 2 and
3 - I had to use a reciprocating saw to cut them out in several pieces.
Sanded the worst of the epoxy drips inside the cabin. The bottom edge of
the cabin sides were rough so I belt sanded those smooth. To reinforce the
joints I filleted all deck joints in the cabin with epoxy thickened with
silica and 1/4" chopped strand. Everything had to be done overhead -
a godaweful messy day. I had to throw out my red boat building shirt
:(. |
6hrs |
|
| 7/4/04 |
Sanded overhead in
cabin. Awful ! Laid first coat of epoxy on cabin floor. Cut and glued
blocking at forepeak of the cabin sides. Glued in panel joiners in
foredeck. |
5 hrs |
|
| 7/5/04 |
Applied 2nd and 3rd
coat of epoxy on cabin floor. Glued seat backs in place. |
4 hrs |
|
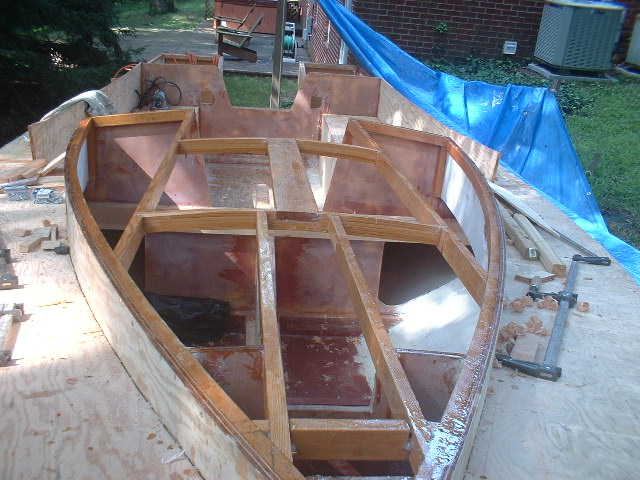
| 7/17 -18/04 |
Framed in cabin
roof. I ran into a problem with the main fore-aft beams and had to cut
them twice. I started out assuming they should be square to bulkhead 4 -
well, maybe the should be, but bulkhead 4 must be slightly warped as they
sure were not parallel with each other. I started again, this time cutting
and fitting the arched beams first to build the fore-aft beams parallel.
Otherwise, this was a fairly straight forward operation. |
7 hrs |

|
| 7/26 -28/04 |
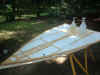
Trimmed cabin top framing. Cut cabin top ply -
2 layers of 1/4" marine fir. The cutting diagram in the pdf files
worked well for overlapping the seams. On the bottom layer I joined the
athartships seam on the saw horses with one layer of tape on the side
exposed to the cabin. The other side will be covered the the second layer
of ply so does not need tape - but be careful lifting the ply into place
to make sure it does not fold at the seam. The white areas are
pre-finished with pigmented epoxy prior to installation. I think this
saved some time...
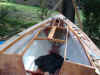
The next day, the cabin top was installed. The top layer just screws
down onto the bottom layer and the "side wings" glued into place
with out tape. I had one or two holes to patch on the inside, but screwing
into the framing provides adequate joining pressure for the two layers. On
the third day I cut the hatch and mast slot areas and dressed the edges of
the cabin top flush with the cabin sides using a plane and belt
sander. |
19 hrs |
|
| 8/8/04 |
Sanded topsides to start preparing for glass |
3 hrs |
|
| 8/21 -23/04 |
Cut, fit, and installed hatch slide supports
and mast slot coaming. Glassed cabin top and applied 3 coats of epoxy.
!@#$ oak tree dropped a rotten branch into the second coat, but it cleaned
up OK with some extra scrapping. |
12 hrs |
|
| 8/28 -29/04 |
Glassed starboard top deck and cabin side, 3
layers of epoxy.. |
12 hrs |
|
| 9/4-6/04 |
Glassed port top deck and cabin side, 3 layers
of epoxy. |
12 hrs |
|
| 9/11 -12/04 |
Glassed seats, seat backs, seat fronts, 3
layers of epoxy. |
14 hrs |
|
| 9/19/04 |
Sanded port side deck and cabin, cleaned up
major epoxy globs in cockpit and sanded to bare floor to prep for glass. |
4 hrs |
|
| 10/2 -3/04 |
Glassed forward cockpit floor and CB case. |
8 hrs |
|
| 10/9 -11/04 |
Glassed rear cockpit floor and motor well |
8 hrs |
|
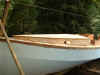
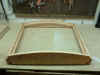
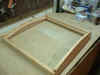
| 10/16 -17/04 |
Cut framing for cabin slide hatch and glued up.
Cut and scarphed rub rails. Note added 5/6/07 - be sure to take
the time to use proper and strong joinery for the hatch - use a box joint or
something similar. The simple joints I used did not hold up well. Also,
while the oak and fir parts looked good together, the different rate of
contraction and expansion (and shrinkage) led to sizable cracks in some of
the joints. I'll probably need to rebuild the hatch in a year or so, and
will probably not be so fancy next time. I do still like the curved hatch
top compared to the flat top in the plans so I will keep that aspect. In any
case, be sure to build your hatch strong as you will need to stand on it to
raise and lower the mast.
See close ups of the completed hatch in
place on the boat here. |
10 hrs |
|
|
|
|
|
|
Go to Construction Page 1,
2, 3,
4, 5,
7, 8,
9 |
|
|
|
Home |
|
|
|
|
|
|