|
Chebacco Construction
Page 4
|
|
|
| Date |
Work Completed |
Time Estimate |
Photos |
| 12/6/03 |
Glassed inside of
rudder parts; applied 2nd coat and glued upper and lower wood spacers on
one side in afternoon.
Cut two 1/2" ply plugs to fit inside of rudder
post; epoxyed into place.
|
1.5hrs |
|
| 12/7/03 |
Applied 3rd coat of
epoxy to inside of rudder; glued rudder sides and post together. |
1 hr |
 |
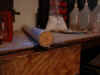
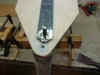
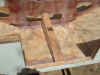
| 12/14/03 |
Shaped and attached
straps to rudder post and sides. I used a 3/8" steel pin through the
post and straps to lock them into position on the post. The pin is cut
about 3/16" longer than flush and both ends are then hammered into a
mushroom shape to act as a rivet. The straps are attached to the sides
using normal wood screws. Also glued the bottom onto the rudder. |
3 hrs |
|
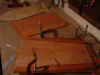
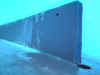
| 12/20/03 -12/26/03 |
Glassed the outside
of the rudder using 4" biaxial tape between the bottom and sides,
then 5 ounce cloth on all surfaces.
It is during this period that I discovered
that I had mis-marked the end of the aft keel and it is 3" too short
(d'oh!). I patched an extension onto the keel to correct the
problem.
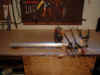
When I fabricated the rudder pin I made the
part that attaches to the keel 3" longer than specified to compensate
for the keel extension. The rudder pin is made of steel, since that is
what I can get and weld up on my own.
The rudder has been drilled out to accept a
nylon spacer that fits the rudder pin very nicely. |
8 hrs |
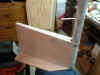  |
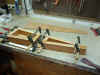
| 12/28/03 -12/31/03 |
Finished glassing
the keel extension. Also cut and started attaching the inwales. I had to kerf the stringer in several places to get it to take
the compound curves. Cut the parts for the rudder shaft box. |
8 hrs |
|
| 1/1/04 |
Finished gluing up
the inwales. Glassed the inside of the rudder shaft box. |
4 hrs |
|
| 1/2/04 |
Finished glassing
and assembled the rudder shaft box. |
2 hrs |
 |
| 1/3/04 |
Finished shaping rudder box and attached it to
the hull.
Drew layout lines for seat and other framing on bulkheads |
4 hrs |
 |
| 3/13/04 |
First decent weather in some time. I sanded,
sanded, sanded the outside of the hull. Applied touch up epoxy. |
7 hrs |
|
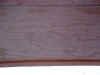
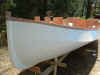
| 3/20/04 |
Final sanding of hull. Removed sanding dust
with mineral spirits and a rag - it took three passes, rinsing the rag
frequently, to get the hull adequately clean. Applied first coat of one
part polyurethane porch and deck enamel, gloss white. Using a standard
paint brush the paint seemed to be going on too think, so I switched to a
small foam roller, which worked OK. |
4 hrs |
|
| 3/21/04 |
Sanded runs smooth and did a light overall
surface sanding with 180 grit to knock off the worst of the lint, dust,
bugs, and other imperfections. Wiped down with mineral spirits and rag.
Applied second coat of paint using a 9" pad. This gave very good
results and fast work. |
4 hrs |
|
| 4/3/04 |
Built two lifting frames consisting of 4x4
uprights and 2x6 cross members, with 1x4 corner bracing at the top. The
4x4 uprights were sunk into the earth 24 inches deep using a post hole
digger and packing the dirt in around the post. The frames works fine, but
the lifting rope had too much stretch in it and I could not get the boat
high enough for a clean flip. Still, flip it we did. t took three people
fully engaged to keep things under control and no one left to take
pictures. Sorry about that - but take a look at Bill Sampson's photos of
when he flipped his hull - it was very similar to that. |
5 hrs |
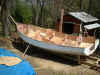 |
| 4/17/04 |
When the boat was in the air I pulled the cross
members from the strongback so that the keel would fit down between the
long beams. Today I leveled the boat fore and aft (it was already level
side to side since the bottom is sitting on the level strongback) and
braced the hull in position. It didn't take a lot of bracing - two sets
of 2x4s fore and aft and a 2x2 on each side for lateral stability.
So far this has worked well.
After bracing, I took the grinder to any major epoxy globs on the
inside of the hull and the orbital sander to any other epoxy on the inside
to prepare for later gluing.I also cut and installed the floor boards
arond the center board in the cabin and the beam spanning the centerboard
trunk. |
7 hrs |
 |
|
Go to Construction Page 1,
2, 3,
5, 6, 7,
8, 9 |
|
|
|
Home |
|
|
|
|
|
|


